
WHAT A CRAZY BLAST I had with this Crazy, Creative, Mosaic Tile Project. I have always loved working with tile, because PERFECTION is NOT a necessity, haphazardness in design is encouraged, and the sky is the limit as far as creativity goes! WOOT~ what more can a 'crazy' craft lover ask for?

When picking my latest mosaic project, I thought I would start with a trip to the second hand store (one of my FAV places to shop) and I found this ADORABLE letter Caddy for $2.50! There were several things I loved about this little steal of a deal: a) It has recessed areas for TILING, b) it has a slide up and in lid like a roll top desk, c) I loved the light color of wood, considering that I wanted to use some darker tiles and it would contrast so beautifully. Most people would see a simple box made of wood, I saw a box with a 'beautific' outcome! =) Expand your mind when you go to second hand stores. You need to 'look beyond' the initial presentation of what is being sold to, what the item can become!

So, I have my 'base', my box, now I need my materials. Several years ago, I turned to a wonderfully informative book for beginning mosaic 'tilers' like myself! And this is the best book around! Heidi Borchers' "Beginner's Guide to Mosaics". I found this book at Hobby Lobby, but I know you can also order it on Amazon, and you might even want to check Ebay. Here is a description of the book: Leisure arts-Mosaics are a snap to create-especially when your teacher is Heidi Borchers! Heidi has developed a simplified approach to the art form that will have you creating lovely tile and glass inlays. from small gift items to enchanting garden enhancements there are designs to please everyone. use an array of materials to transform a variety of surfaces with the time-honored skill of mosaic crafting-made easy.
( paperback: 44 pages)
( paperback: 44 pages)

I used this book to make my list of things needed, and some ideas about what to put on my box. Here is a basic supply list for any tile project:
- the 'base' that you will be tiling (mine is the letter box)
- Wheeled Tile Nippers (purchased at any craft store)
- A Glass Adhesive (I use "Glass, Metal and More by Beacon Adhesives)
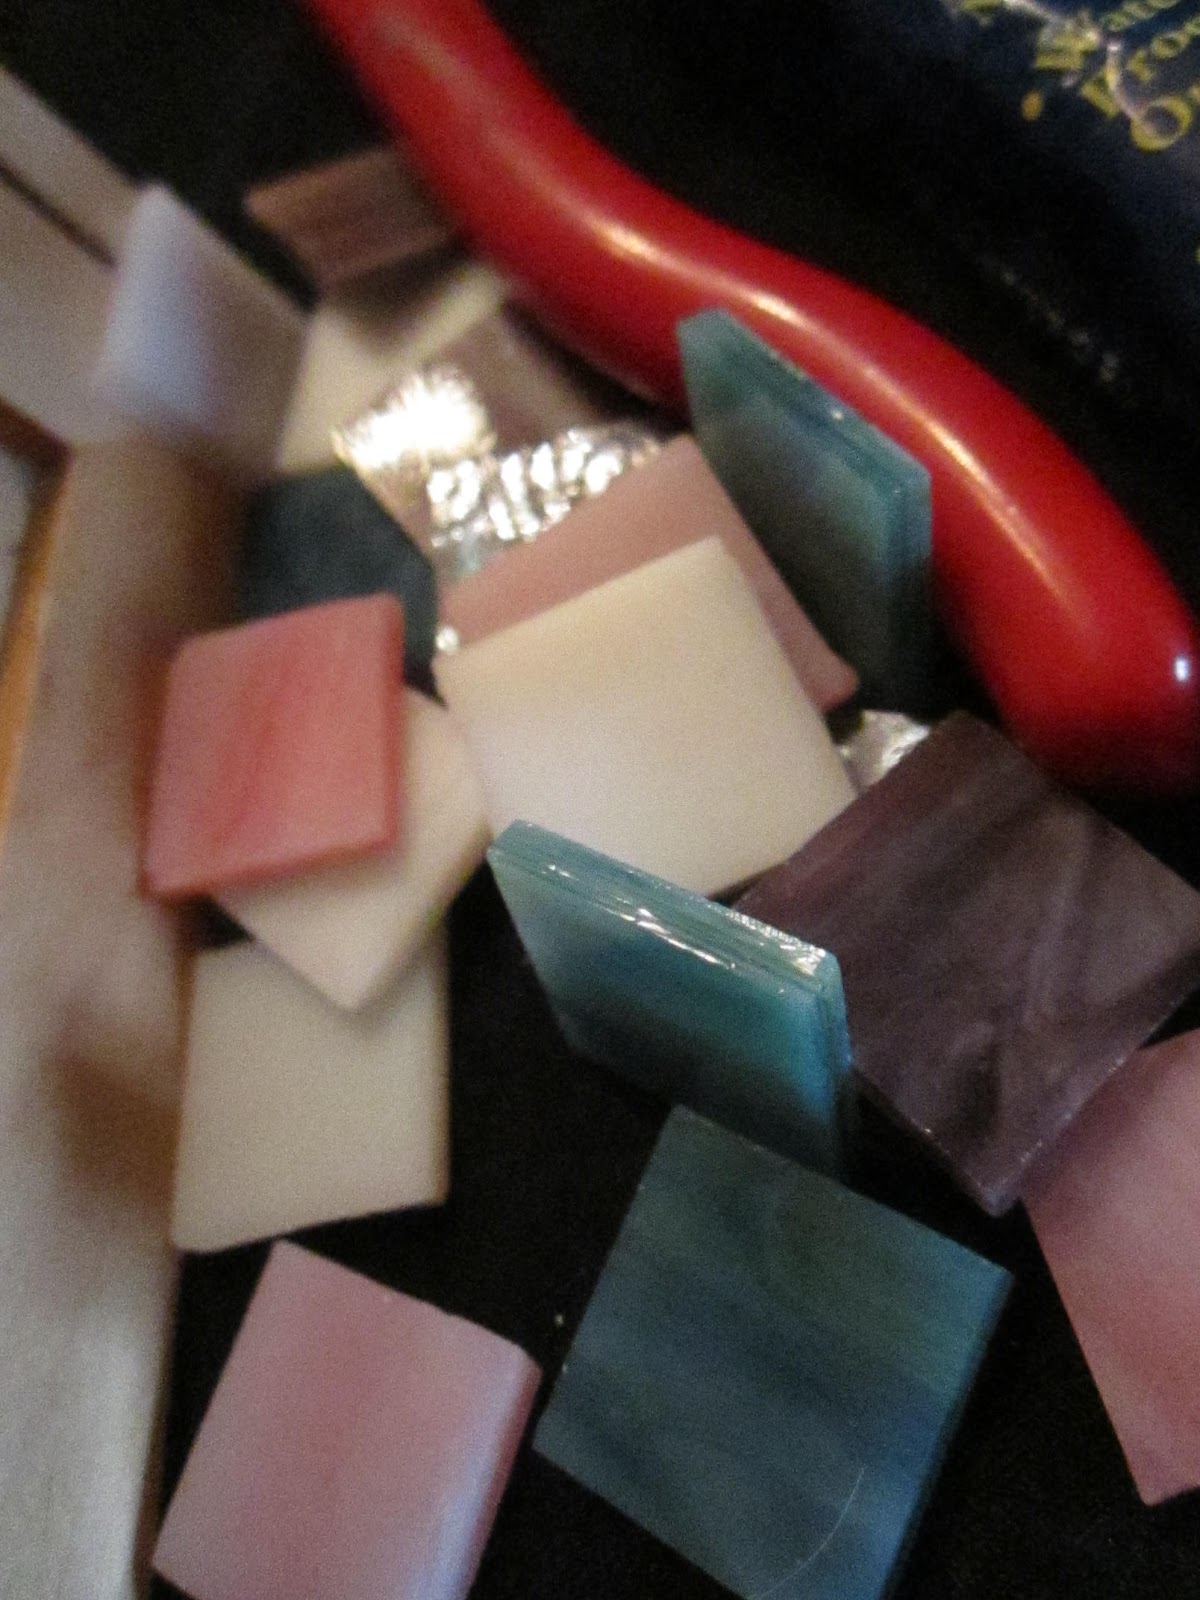
- Mosaic Tiles of your choice (they can be found in ANY craft store ~ and I am working with pink, green, purple and white)
- goggles
- gloves
- Grout (I used MOSAIC MERCANTILES Mosaic Tile Grout ~ I loved it because it was premixed)
- Craft stick or plastic putty knife
- grout sealer with sponge
- tracing paper


To begin, I covered my work area with Kraft paper to protect my work surface. For the top inlaid portion of my box, I chose to do a very simple pattern of 'whole' tiles in 4 colors ~ green, pink, purple and white, and I chose to lay them in a simple diagonal pattern. Using my tracing paper, I cut a piece of paper the same size as the inlaid section of the box. I laid my tracing paper on a flat surface and then laid out my tile pattern on the tracing paper to make my design, and make sure it would fit in the inlaid slot. I then photographed the layout so that I would have something to refer back to as I began gluing pieces into place. I began gluing my pieces in place, placing the top row first, and then one side. I then slowly filled in the rest. You only need a small dollop of your adhesive, as you do not want the glue to show around your tile pieces. Also, make sure you leave a small space between the tiles for the grout. After all of your pieces are glued into place, you will want to allow sufficient time for the glue to dry before grouting. I decided to design, create, and glue the front portion of my box first before beginning the grouting process.


For the inlaid portion on the front of my box, I chose a design from the Basic Mosaic Book as a 'general' guide for my project. I NEVER stick with a set pattern, as I like to make my OWN CRAZY CREATIONS! But I did choose a 'heart' pattern to go onto the front of my box. I liked the shape of the heart, and knew it would fit on my box along with the border I wanted to create around the heart. Once again, I cut a piece of tracing paper the size of the boxes front inlay, and I cut a second piece where I would draw my heart. From the back of the “Beginner’s Guide Book”, I traced the heart pattern from the ‘reflective heart’. (p. 41) onto the second piece of tracing paper, and I cut the heart out of the tracing paper and traced it directly onto the surface of my wood. I then laid the ‘inlaid’ piece of tracing paper out on a flat surface, and began laying out my border around the edge of the paper. I used the green and purple tiles to form the border. NOW for the FUN part!


laid them in place, and once again photographed my tiles so I could replicate the placement when gluing the pieces in place.

Here is a GREAT LINK for the proper way to use
your Wheeled Tile Nippers:

When all was cut and placed, I laid the box down so the front of the box was facing up, and I began gluing the border in place. Next, referring to my photographs, I glued the heart into the heart that
was traced on the wood. Then referring to the photograph of the outlined portion of the heart, I glued those pieces into place. When all was glued into place, I let the box rest right where it was so the tiles would dry and not shift.

Next comes the grouting. Because I use a premixed grout, I did stir it well before applying it. Using my craft stick, I worked quickly to apply the grout between the mosaic pieces, filling in all the spaces. Then using my sponge grout sealer (with sponge on other side), I ran it completely over the tiled surfaces to fill in every nook and cranny.

Once the entire project was grouted, I began at the top of the project, and using a slightly damp sponge I rubbed it gently to uncover the tiles and smooth out the grout. Don’t wipe the pieces too much, but leave a grout haze on them.


I allowed the haze to air dry or if I am in a hurry, I will use a hairdryer on low for several minutes until the haze is dry and looks chalky. I am careful to avoid the damp grout between the pieces. Then using a dry paper towel, I clean each mosaic piece separately. If needed, you can use a cotton swab for any detailed cleaning. I allowed my grout to dry overnight. And then I use vinegar on a cotton swab to clean up any tiles that still have any remaining haze.


And now you see the finished product. SO CUTE… SO EASY… SO INEXPENSIVE. When using mosaic tile your projects are endless, and fun. I hope you will see how easy mosaic tiling is, and how much fun it can be for you to create your very own CRAZY MOSAIC TILE MASTERPIECE! Just a reminder, that the book, Heidi Borchers’ “Beginner’s Guide to Mosaics”, is an incredible resource when you are getting started, so you may want to pick up your own copy.

Now, trying to decide what creative project, trip, or recipe to share next…. SO MANY CRAZY POSSIBILITIES! Hope you will join me again soon.

Living, Laughing, and LOVING the “Crazy Colorful Mosaic’ called my life,

Patti

Here is a little stool that I tiled to go in my foyer. On this stool, I actually used china plates from the second hand shop ~ broke the plates into pieces, and combined with other tiles. I also got the stool at the second hand store! Oh the possibilities!

“And will you succeed? Yes indeed, yes indeed! Ninety-eight and three-quarters percent guaranteed!” Dr. Seuss

I have just found the best link to some great 'life' quotes and I wanted to share it with you. I am always looking for quotes to inspire, and the author Dodinsky has a plethora of great quotes for any occasion!